How to draw a face step by step
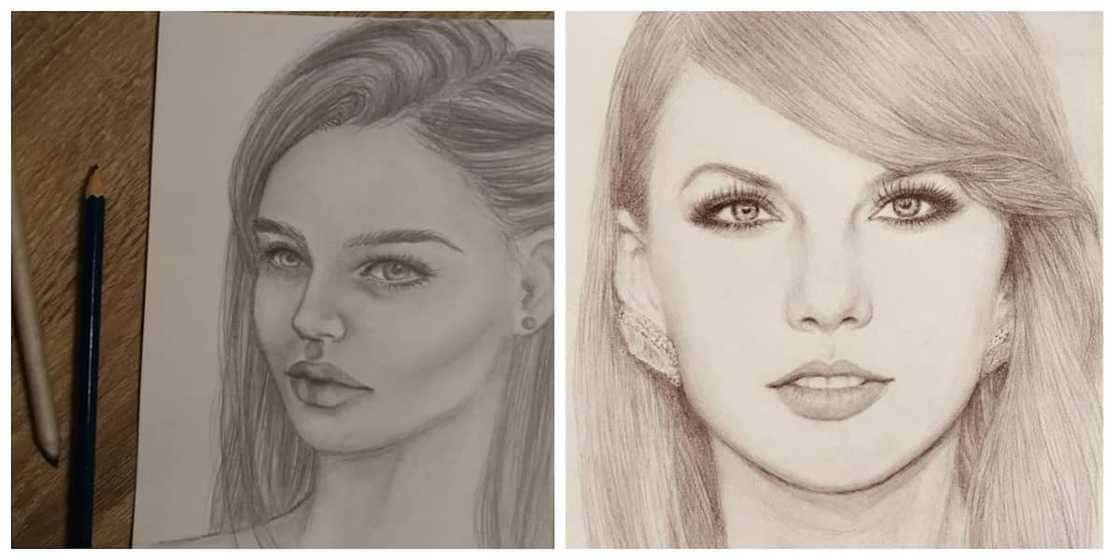
How do you draw a face profile? Drawing is an exciting form of art that everyone, whether young or old, can master with basic coaching and training. While some people are born with artistic fingers, others must use inspiration and skill lessons to perfect their work. On the benchmark, both talented and trained artists become better through practice and continual learning. So, what should you know on how to draw a face to bring out a display of features and emotions? This can also be a guide on how to draw a face for kids. Read on!
Source: Instagram
The face is one of the primary parts of the human anatomy that calls for a sophisticated display of artistic curves in drawings. As such, it is crucial to follow our guide keenly for clean work and sharp features. It is a good practice to minimize unnecessary rubbing of your work as this may compromise the integrity of your drawing. Some tools and requirements necessary when drawing a face include an HB Pencil, a ruler, an eraser, a clean sketch paper, and colorings, if necessary. Managing excellent facial drawings is a significant step in training to become a famous artist. Below is a discussion of facial sketches and easy drawings for beginners. Besides learning how to draw a person’s face, you will also master how to incorporate personalities while trying to express different emotions.
READ ALSO: How to apply makeup step by step for beginners
How to draw a face?
Source: UGC
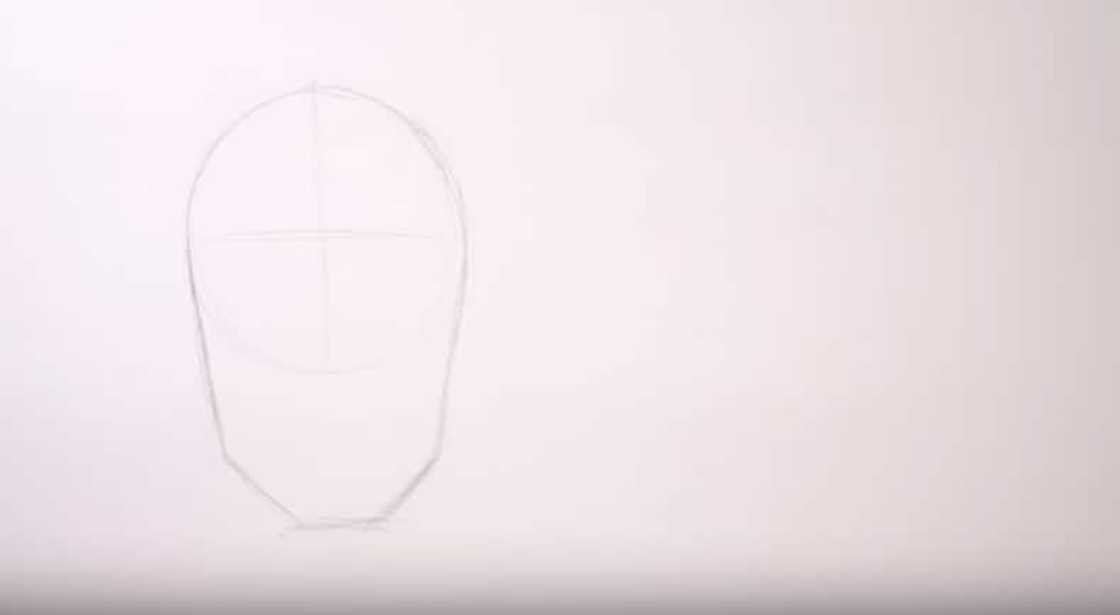
Initiate your face drawing with a couple of overlapping circles. A couple of circles will form the head basis, simplifying your drawing even further. It is interesting to note that the intersection between the circles is the basis for the eye level. Run down a center line inside the circles to give the sketch a symmetrical shape.
Facial features: drawing step by step
With the sketch ready, it is time you start adding one element at a time using the guide provided below. At this point, seek a fuller understanding of the elements you intend to capture and how to present them in your facial drawing. We have accompanied the various drawings of faces to give you a picture of what you should expect.
1. Add construction lines
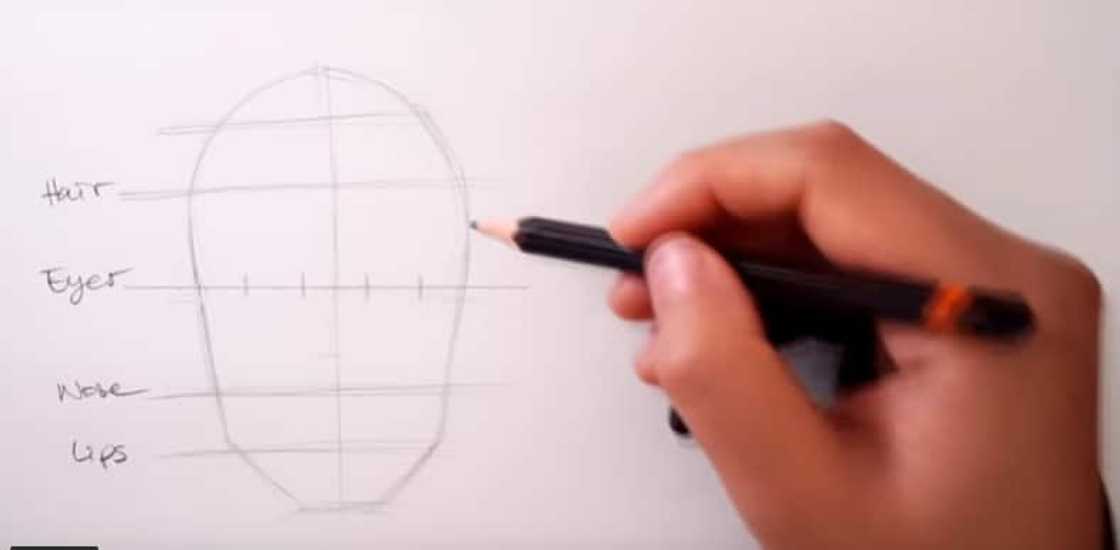
Use different guidelines such as the intersection line and center line to plan out and place features in their correct positions on the face.
Source: UGC
Lay out the forehead by drawing a couple of lines slightly from both sides of the circles. The plan should equally indicate the positioning of the cheekbones. Use the center intersection to outline a triangular shaped nose to help you establish the positioning of the mouth. Now, come up with a couple of triangles for the eyes such that you can mark out the eye sockets and eyebrow positions as well.
2. Try different proportions
Note that variations in the sketch circles you create will result in unique facial shapes and images. Head dimensions are fundamental in coming up with varying forms of head and facial effects. Note that elongated circles result in long head shapes while squashed circles give a fuller and broader facial effect.
3. Line up different facial features
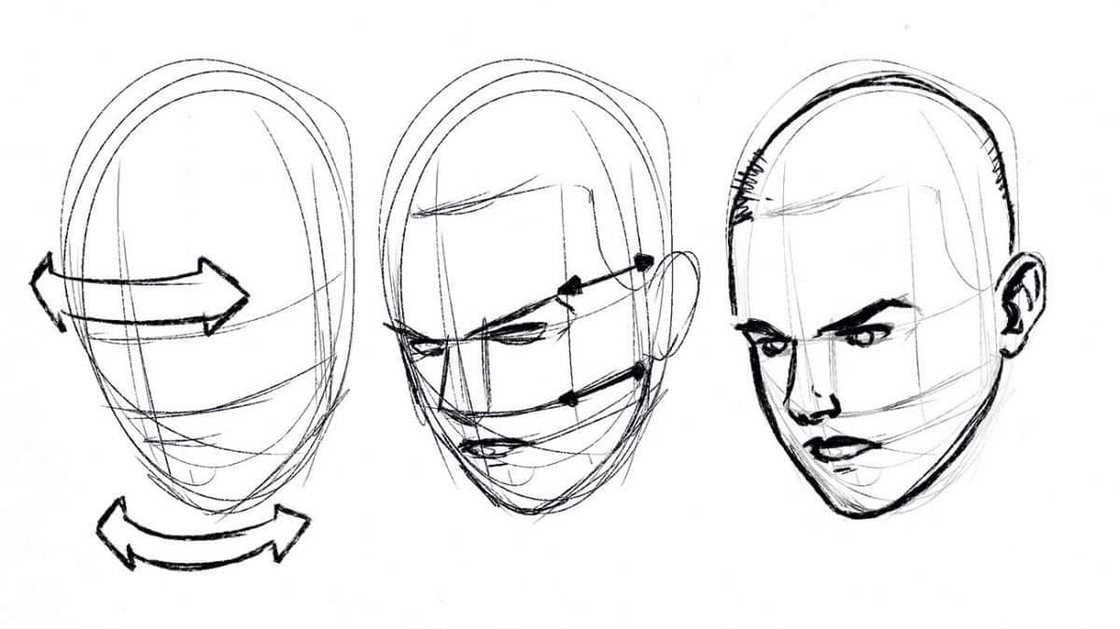
Imagine the features as though wrapped around a cylinder and then come up with a distinct drawing.
Source: Twitter
When lining up various facial features, it is important to realize that the nose, eyes, and mouth fall in the same plane. As you trace out different features, perceive them as though they lie on a cylindrical surface. The impression is helpful in giving your drawing a sense of reality touch and natural curves. Be sure to position the bottom of the nose and the top of the eyebrows is a proper lining with the height of the ear. Your facial drawing will look very natural and appealing where different features are precisely mapped out.
4. Begin with the eyes
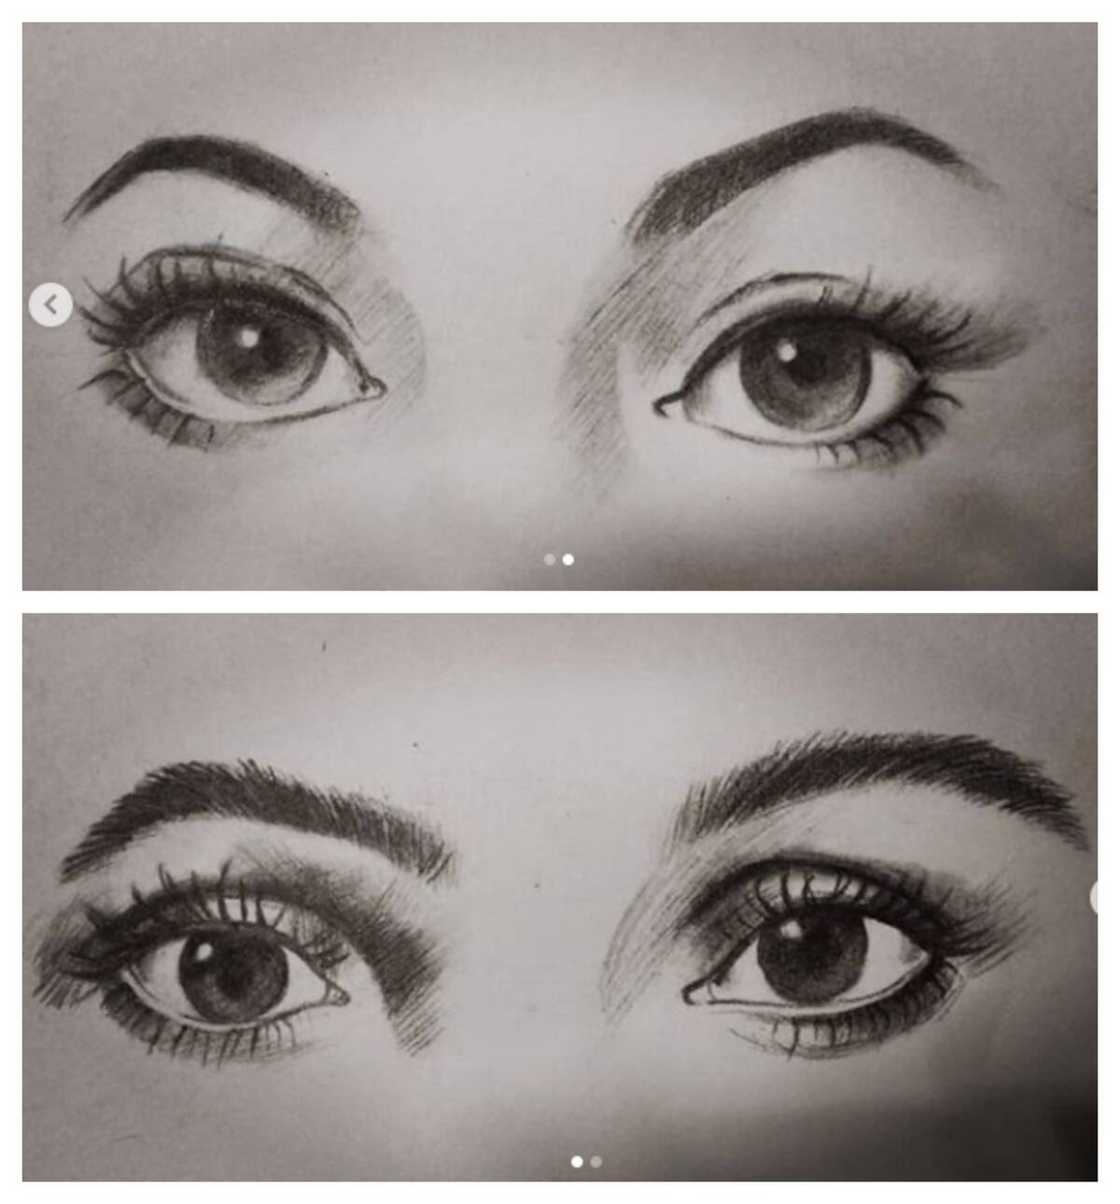
Eyes will undoubtedly bring your drawing to life; hence, they should come first in the drawing. Here is how to draw eyes.
Source: Instagram
Eyes display much information in real life. For this reason, take your time and give out the right emotion through your drawing. Correctly drawn eyes will go a long way to bring out the intended emotions. It is also advisable to keep the eyes focused and give the top eye a thicker line to suggest an eyelid shadow. Also, note that thicker and longer eyelashes bring a more feminine impression in your drawing.
READ ALSO: How to style braids 2018
5. Include the nose
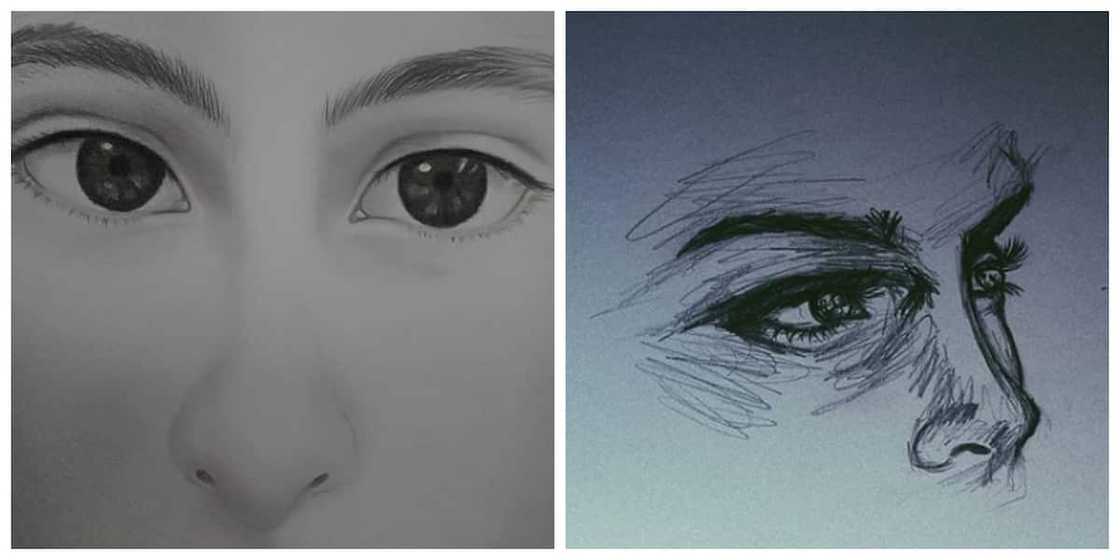
The tip of the nose is diamond shaped with lots of variations. Here is how to draw a nose.
Source: Instagram
The measure of your facial drawing potentially relies on how you draw the nose. While the feature appears as the easiest, it is no doubt that it is tricky to draw out the nose perfectly. Start by creating a diamond shaped triangle at the nose tip. Move to the nostrils and add in a heavier weight line and shadow at its base. Always maintain light details and overlook unnecessary information in your drawing.
6. It is time for the lips
Lips are an expression of love and therefore should appear with fineness in your drawing.
It is time to sit in front of the mirror for a close examination of your lip outline. Start by exploring different lip layouts the put down that which will fit in your drawing well. It is essential to use a little sketchbook before printing any detail in the picture where no error is welcome. For more inspiration, follow television and film programmes and discover how actors portray their lips on camera. It is also helpful to try different mouth shapes by saying phrases such as “Ah,” “Oh,” and “Esss” among others before you start drawing.
7. Male or the female face?
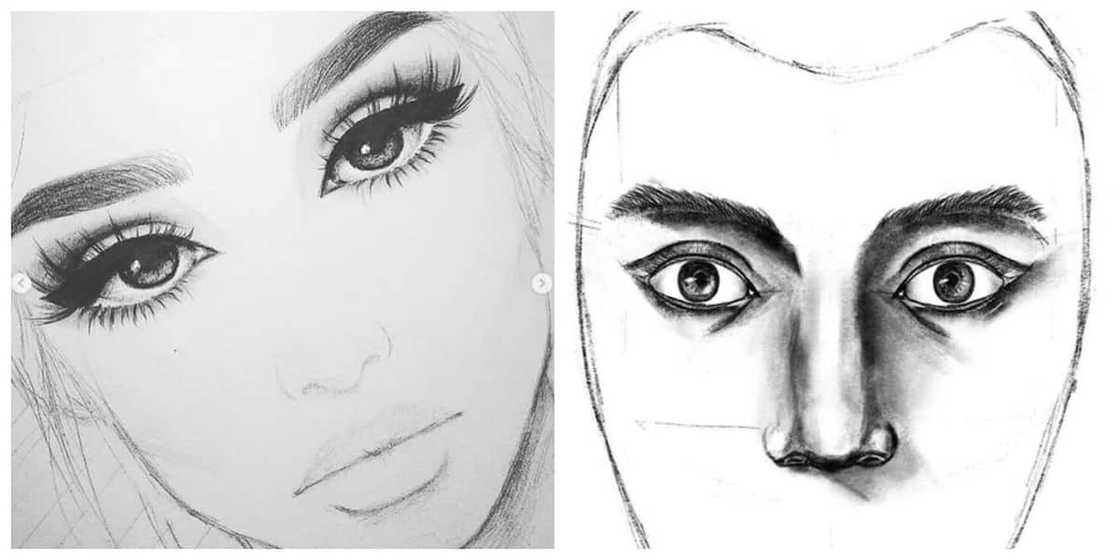
Before you start, you always have in mind which faces to draw. Male faces are often angular. Play around the phrase to achieve your desired male of female impression.
Source: Instagram
It is important to note that male faces are remarkably harder and singular shaped. On the other hand, female faces are softer and much rounder from general observations. When drawing female faces, try as much to bring out fuller lips, rounder cheeks, and larger eyes. These simple ideas should; however, serve as the guide and not as inflexible rules.
8. Grow some hair
Growing hair for men is generally manageable compared to ladies.
Start with some basic hair shapes probably on your sketchbook. The fact that hair is bigger than the scalp should guide your outline. Add directions to the hair and be keen when adding strokes starting the head crown. Now, include a sense of weight at its bottom to make sure that it has a natural appearance. In your drawing, incorporate thinner internal lines and thicker outlines to give it a sense of direction.
9. Polish up your drawing
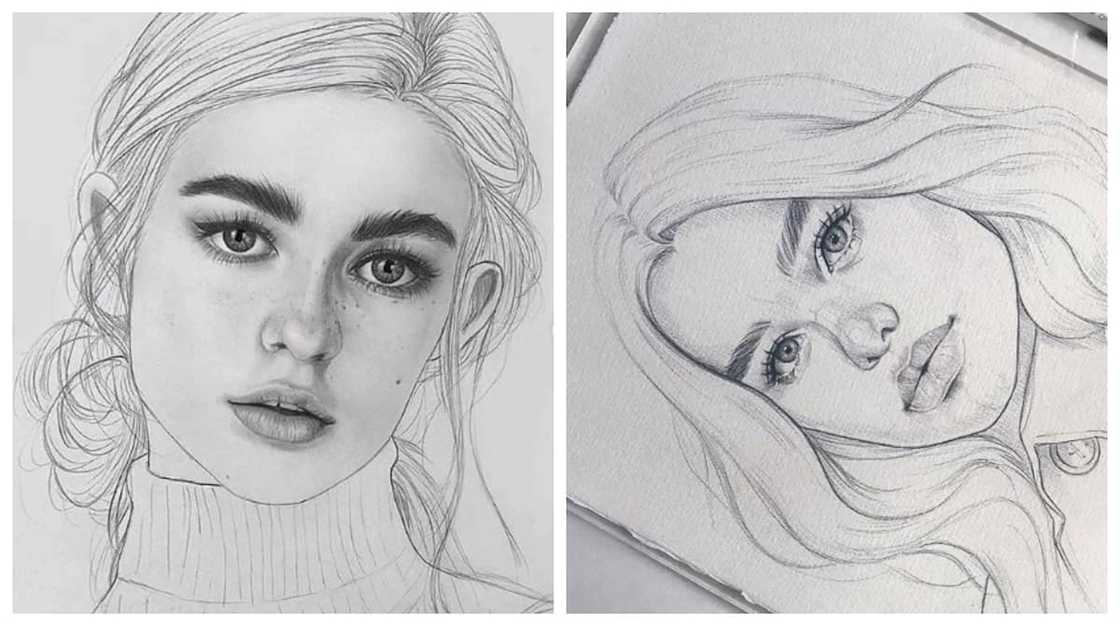
Polishing stands out as an advanced level of the drawing process that entails exaggerating emotions to give a statement to your drawing.
Source: Instagram
One good way to come up with accurate impressions is by using a photo reference. Trying different shapes and facial features in a mirror will serve as a guide to your intended looks. Remember to skillfully add facial lines to clearly express both age and emotions of the person you are drawing. Another essential polishing tip is exaggerated eyebrows to show anxiety. With a complete face, you can play around with your pencil or pen to bring out your intended body language in style. It is also a good idea for you to explore close up drawings that may as well serve the purpose compared to full face portraits. Using picture references remains the most straightforward apprhow to draw a faceoach and guide on how to draw faces.
READ ALSO: Top tips on how to make makeup your beauty weapon of choice
How to draw a face is both an art and a science that everyone can learn with proper tools at hand and a passion to begin with. Planning about your drawing beforehand is necessary to make sure that you achieve the best results. For instance, it is important to determine factors such as gender, age, and emotions before you lay up a sketch. With the drawing tips provided above, you should have an easier time following the steps. Happy drawing!
READ ALSO:
- How to make Malva pudding sauce
- How to do eyebrows at home
- How to write a literature review
- How to make playdough at home
- How to clean an iron bottom
Source: Briefly News

